This section includes step-by-step instructions on how to integrate Bankident webview.
Solaris' standalone Bankident webview enables you to identify customers in a unified session. You initiate the session, and Solaris handles the intermediate identification steps, ensuring rapid integration and low maintenance.
If you want to use IDnow as the KYC method in another integration flow of any of Solaris' products (e.g., there's an existing person resource and verified mobile number for the customer), you can jump to Step 3.
Solaris recommends subscribing to the following webhook events to better automate your processes. For detailed instructions on implementing Solaris webhooks, check the webhooks documentation.
- IDENTIFICATION_SESSION
- PERSON_CHANGED
- PERSON_DELETED
- PERSON_MOBILE_NUMBER_CREATED
- PERSON_MOBILE_NUMBER_DELETED
Integrate Solaris' Bankident webview by completing the following steps:
Setup
- Collect the mandatory information and consent to the legal and regulatory requirements from the customer in your sign-up flow.
- Create a person resource for your customer using POST Create person.
- Create the customer's mobile number.
Identification session creation
- Trigger the identification process by creating an identification session using POST Create person identification session.
- Redirect the customer to the URL returned from the previous call to complete the identification process.
You can find detailed descriptions of these steps and their related endpoints in the following sections.
In this step, you must collect the mandatory data points from the customer in your sign-up flow, including all the timestamps of the customer's consent to the legal and compliance screens. Afterward, pass all the data points to Solaris by creating a person resource.
This endpoint creates a person resource for your customer. You must collect the mandatory data points from your customer in the sign-up flow and pass them to Solaris in the request body of this endpoint.
salutationfirst_name(including all middle names as printed on the ID document)last_name(including all name parts as printed on the ID document)birth_datenationality(Use ISO 3166-1 alpha-2 codes)mobile_numberaddress(Street, Number, City, Post Code, Country, State)data_terms_signed_at(UTC timestamp)terms_conditions_signed_at(UTC timestamp)
Request URL
POST /v1/personsRequest example
{
  "salutation": "Mr",
  "first_name": "Marc",
  "last_name": "O'Polo",
  "birth_date": "1999-01-01",
  "nationality": "DE",
  "mobile_number": "+4917612345678",
  "address": {
    "line_1": "Solaris street",
    "line_2": "1",
    "postal_code": "10119",
    "city": "Berlin",
    "country": "DE"
  },
  "tax_information": {
    "tax_assessment_country": "DE"
  },
  "terms_conditions_signed_at": "2021-01-01T00:00:00Z",
  "data_terms_signed_at": "2021-01-01T00:00:00Z"
}
Response
The API returns a person object with a unique ID for the person (i.e., the id). You will need this id to append the person resource with additional information in the remaining steps of this guide.
{
  "id": "dc1a6812a14f6cc338cd084208535bcdcper",
  "salutation": "Mr",
  "first_name": "Marc",
  "last_name": "O'Polo",
  "birth_date": "1999-01-01",
  "nationality": "DE",
  "mobile_number": "+4917612345678",
  ...
}
Click here to view the full API reference
This endpoint updates one or more properties on a person resource. You can only update the following properties using this endpoint:
titlesalutationaddress(line_1,line_2,postal_code,city,state,country)contact_address(line_1,line_2,postal_code,city,state,country)employment_statusjob_titleemailtax_information(tax_assessment,marital_status)fatca_relevantfatca_crs_confirmed_atbusiness_purposeindustryindustry_keyown_economic_interest_signed_ataml_confirmed_on(only with today or tomorrow's date)expected_monthly_revenue_centsvat_numberwebsite_social_mediabusiness_trading_namenace_codebusiness_address_line_1business_address_line_2business_postal_codebusiness_citybusiness_countryannual_income_rangedata_terms_signed_atbranchbirth_provincebirth_post_codesocioprofessional_categorypurpose_of_account_openingmain_income_sourcework_countrywork_provinceself_declared_as_pepinternational_operativity_expectationregistration_number
Restricted Updates:
- Fields not mentioned in this list can only be updated via Customer Support.
Freelancer & Self-Employed Requirements (B2C):
- If a customer changes their
employment_statustoFREELANCERorSELF_EMPLOYED, you must include one of the following in the request to avoid an error:- The customer's
nace_code(Recommended for data quality). - Set
industryandindustry_keytonull.
- The customer's
Request URL
PATCH /v1/persons/{id}Request example
{
  "email": "new.email@example.com",
  "address": {
    "line_1": "New Street",
    "line_2": "1",
    "postal_code": "10119",
    "city": "Berlin",
    "country": "DE"
  }
}
In this step, you must attach a mobile number to the person resource.
For Bankident Webview, you must only create the mobile number resource. Do not trigger the authorization or confirmation endpoints (OTP flow). Solaris handles the mobile number verification automatically within the identification webview session.
Request URL
POST /v1/persons/{person_id}/mobile_numberRequest example
{
  "number": "+15550101"
}
Response example
{
    "id": "91e4d939d781b8eb30d1ee86809761c2cmno",
    "number": "+15550101",
    "verified": false
}
Click here to view the full API reference.
For more information about how to manage mobile numbers (e.g., changing or deleting a number), check the related mobile number management guide.
In this step, you must create an identification session for the customer to start the identification process. The identification session is a series of screens containing all the intermediate identification steps your customer must complete in a single identification webview session.
As an initial verification step, you can check whether the relevant customer is eligible for the given identification method or not based on their data, such as nationality, place of residence, or identification document.
This endpoint validates whether the person specified in the request URL is eligible to complete a given identification method. You must add the identification method for which you want to check the customer's eligibility in the request body.
Request example
POST /v1/persons/{person_id}/identification_eligibility_checks
{
  "method": "bank"
}
Response example
The API call returns a response as to whether the person is eligible for identifying with a particular method or not. In case of failure, a reason is provided in the field failure_reason.
{
    "method": "bank",
    "eligible": true,
    "failure_reason": "null"
}
Click here to view the full API reference
Solaris offers an endpoint for validating the IBAN supplied by the customer. If the IBAN is valid, then the API will return information about the account's associated bank.
Request URL
POST /v1/iban_lookupsClick here to view the full API reference.
This endpoint creates an identification session for the person specified in the request URL. You must include a callback_url for the end of the flow and set the identification_methods to be used for the identification.
Make sure to add a URL with the proper format with HTTPS://. Otherwise, a session error may occur.
Request example
POST /v1/persons/:person_id/identification_sessions
{
    "callback_url": "https://www.callbackurl.com",
    "identification_methods": [
        "bank"
    ]
}
Response example
The API call returns an object for the identification session with a unique id and the url to which you must redirect the customer to complete the identification process.
Additionally, the API response includes the status of the identification session. For a list of possible values for this field, check the appendix.
{
    "callback_url": "https://www.callbackurl.com",
    "status": "created",
    "id": "acdede097f821bd8037465d691f69506ises",
    "url": "https://person-onboarding.solaris-staging.de/9AXlUH0ptsZoFef2n8LKiqpEAizdJTjVQ4tzZeu1LpvqbK201REXFG_EBwiGTw0PLlHWCaA7NLOOcUh1u_a7HUpp7wYMNlGnzALka-v_9MVOxOIfN73lFjFg7JMtBdJO",
    "identification_methods": [
        "bank"
    ]
}
Click here to view the full API reference
This endpoint returns the information about the identification session created for a person. Register to the webhook event IDENTIFICATION_SESSION for status updates on the identification session.
Request example
GET /v1/persons/{person_id}/identification_sessions/{session_id}Response example
200 Ok
{
    "callback_url": "https://www.callbackurl.com",
    "status": "created",
    "id": "acdede097f821bd8037465d691f69506ises",
    "url": "https://person-onboarding.solaris-staging.de/9AXlUH0ptsZoFef2n8LKiqpEAizdJTjVQ4tzZeu1LpvqbK201REXFG_EBwiGTw0PLlHWCaA7NLOOcUh1u_a7HUpp7wYMNlGnzALka-v_9MVOxOIfN73lFjFg7JMtBdJO",
    "identification_methods": [
        "bank"
    ]
}
Click here to view the full API reference
This section includes information and descriptions about the different screens your customer will interact with to complete the identification process.
This is the first screen the user interacts with after the URL redirect from your service. It provides context and prepares the customer for the next steps ahead.
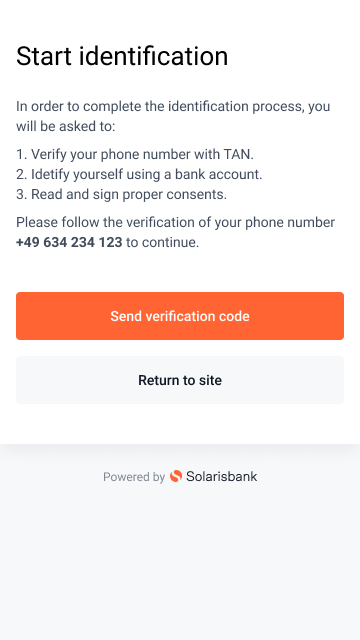
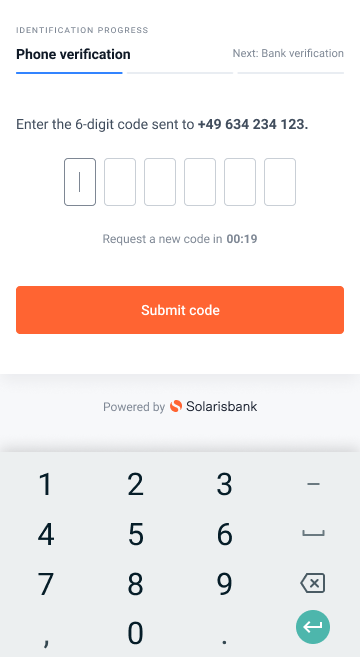
The Bankident KYC session requires a verified mobile number to send OTP SMS for confirmations to the user. Solaris sends an SMS OTP to the customer's mobile number, and the customer must input this OTP into this screen to verify the number.
Customer input on this screen:
- SMS OTP to verify their mobile number
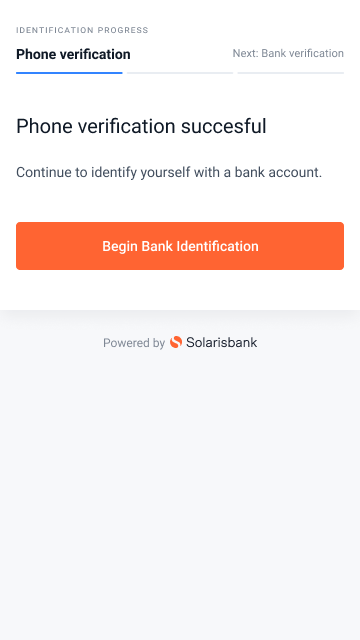
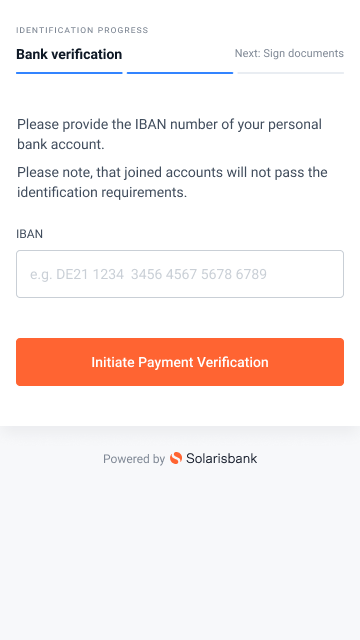
Within the following screens, Solaris validates the customer's provided IBAN and verifies the bank account ownership with a cent transfer.
On this screen, the customer is prompted to enter their IBAN. Then Solaris runs identity checks through SCHUFA to verify if the customer has been identified before with the provided IBAN.
Customer input on this screen:
- IBAN
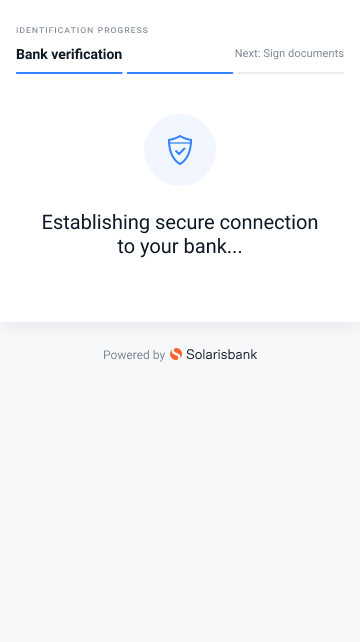
The customer is prompted to log into their bank account to trigger the payment initiation in this screen. Through this step, Solaris verifies the account ownership.
Customer input on this screen:
- User ID
- Password
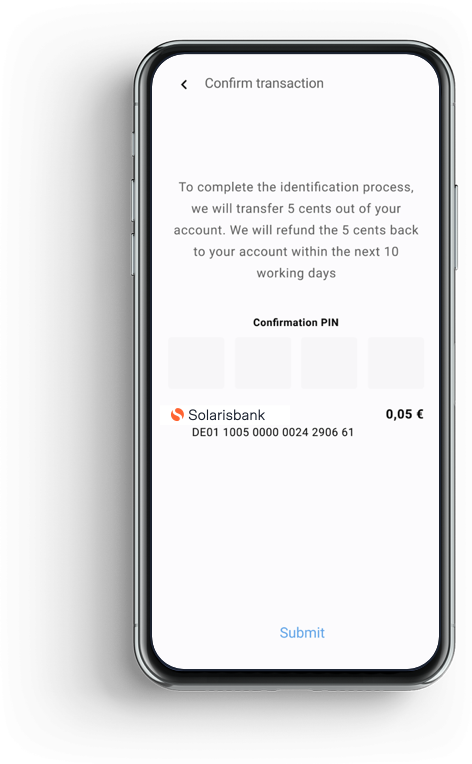
In this screen, the customer verifies that they have access to their account by confirming the cent transfer with the bank's 2FA method.
The bank 2FA method could be entering an SMS OTP or confirming an in-app push notification.
Customer input on this screen:
- SMS OTP
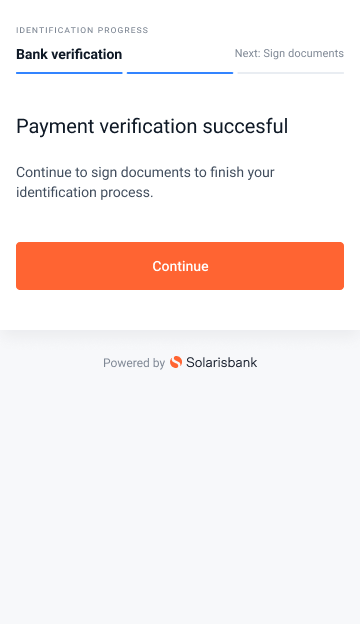
After a successful payment transfer, the customer can proceed with signing the relevant contracts.
The contracts could be a simple KYC report or contracts related to the product the customer is being identified for, such as a loan contract.
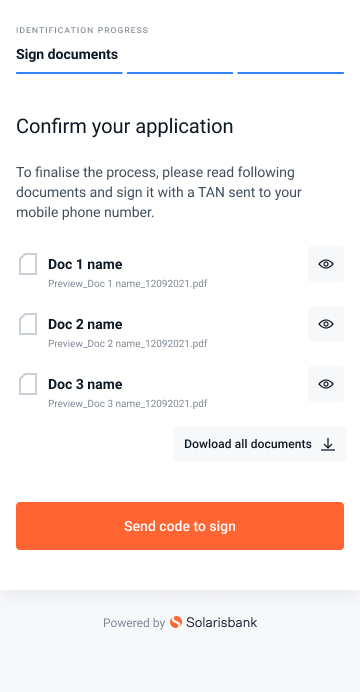
On this screen, the customer should be able to review and read the contracts that must be signed before the QES process starts.
Customer input on this screen:
- Download contract
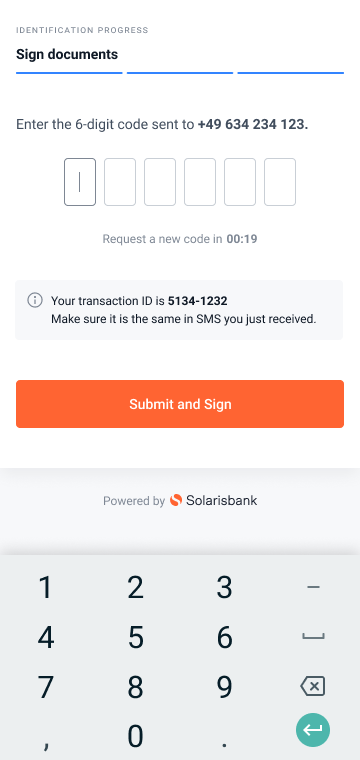
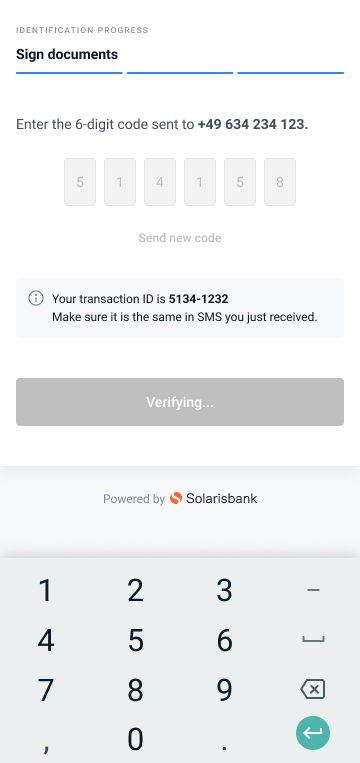
In the following screens, the customer signs the relevant documents by entering an SMS OTP received on their verified mobile number.
Customer input on this screen:
- SMS OTP
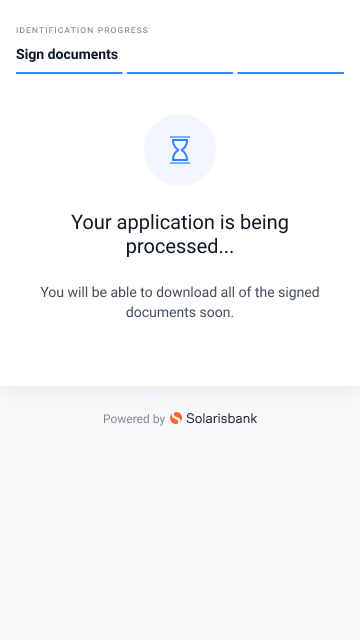
The customers successfully signed the contract(s)
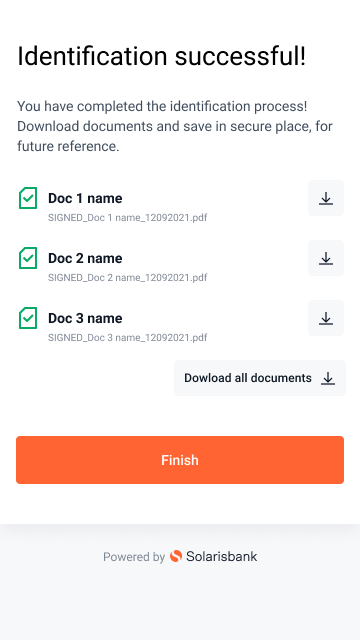
Congratulations! You've successfully integrated Solaris' Bankident webview solution.
Check the following appendix section for additional information on enums, testing data, and Bankident FAQs.
For an overview of other KYC methods, check the customer KYC products overview page.
Check the following links for additional related guides and API reference documentation:
The following table includes the possible values for identification session status and their descriptions.
| Status | Description |
|---|---|
created | The identification session has been created for a customer. The status remains created until the customer completes the identification process. |
successful | The customer has completed the identification process successfully. |
expired | The identification session has expired. This is because the customer did not complete the process within the session's validity time frame. |
Your solution must consider the following edge cases for Bankident:
- The user data was not found.
- The user's IBAN could not be matched to the provided name.
- The account provided is a JOINT account (i.e., shared account).
- An authorized person on the account (i.e., someone who does not own the account) attempts to identify.
- Timeout of 10 minutes between payment initiation and finalization of QES.
You can test edge cases with the following mocked IBANs on Sandbox:
| IBAN | Mocked behavior | Error code |
|---|---|---|
DE11110101010100000020 | Success from service provider & Swisscom (Happy Path) | - |
DE43110101010000000010 | Success—Access by authorized holder | - |
DE22110101010100000016 | User data not found in service provider DB | HTTP 412, MATCH_FOR_PERSON_DATA_NOT_FOUND |
DE33110101010100000012 | User without QBit | HTTP 412, PREVIOUS_IDENT_NOT_FOUND |
DE44110101010100000008 | Account check failed on Schufa | HTTP 412, PERSON_ACCOUNT_MATCH_NOT_FOUND |
DE55110101010100000004 | Account was JOINT | HTTP 409, expectation_mismatch |
DE66110101010100000000 | Account snapshot failed | HTTP 409, expectation_mismatch |
DE77110101010100000093 | Success from service provider and unsuccessful in Swisscom | - |
The following table includes the possible failure reasons for Bankident. These failure reasons are also relevant for the Bankident+ method.
| HTTP status | Error code | Description | UI user error message | Actions |
|---|---|---|---|---|
| 412 | IBAN_USAGE_LIMIT_EXCEEDED | The provided IBAN has been blacklisted due to reaching the limit of failed attempts. | DE: Sie haben das Limit an Versuchen erreicht. Bitte fahren sie mit der Video-Identifizierung fort. EN: You have reached the limit of attempts. Please continue with video identification. | Potential fraud attempt; onboarding should stop. Show a generic message to the customer. |
| 412 | MOBILE_NUMBER_NOT_VERIFIED | The customer does not have a verified mobile number. | Verify the mobile number and retry the call. | |
| 412 | IDENTIFICATION_ATTEMPTS_EXCEEDED | The mobile number or the combination of first_name and last_name reached the limit of failed attempts. | DE: Diese Identifikationsmethode steht nicht zur Verfügung. Bitte fahren sie mit der Video-Identifizierung fort. EN: This identification method is not available. Please continue with video identification. | Potential fraud attempt; onboarding should stop. Show a generic message to the customer. |
| 422 | ALREADY_IDENTIFIED_SUCCESSFULLY | The customer has been successfully identified. | DE: Sie haben sich bereits erfolgreich identifizert. EN: You have already successfully identified yourself. | Stop onboarding. Ask the customer to use their existing account. |
| 412 | MATCH_FOR_PERSON_DATA_NOT_FOUND | The customer's record could not be found in SCHUFA. This usually happens to customers who recently moved to Germany. | DE: Diese Identifikationsmethode steht nicht zur Verfügung. Bitte fahren sie mit der Video-Identifizierung fort. EN: This identification method is not available. Please continue with video identification. | No action needed. |
| 412 | PERSON_ACCOUNT_MATCH_NOT_FOUND | We could not establish a connection between the customer and the provided IBAN. | DE: Für diese IBAN steht diese Identifikationsmethode nicht zur Verfügung. Bitte versuchen Sie es mit einer anderen IBAN oder fahren Sie mit Video-Identifizierung fort. EN: This identification method is not available for this IBAN. Please try another IBAN or continue with video identification. | The customer can try again with a different IBAN. |
| 412 | PREVIOUS_IDENT_NOT_FOUND | The customer did not meet the identification preconditions. | DE: Diese Identifikationsmethode steht nicht zur Verfügung. Bitte fahren sie mit der Video-Identifizierung fort. EN: This identification method is not available. Please continue with video identification. | The customer cannot be onboarded with this identification method. |
| 412 | PERSON_MISSING_REQUIRED_DATA | The customer is missing some of the required data. | DE: Ein Fehler ist aufgetreten. Bitte kontaktieren Sie den Support. EN: An error has occurred. Please contact Solaris support. | Ask the customer to enter the missing data and retry the call. |
| 412 | DEPENDENCY_ERROR | External provider service failure. | DE: Ein Fehler ist aufgetreten. Bitte kontaktieren Sie den Support. EN: An error has occurred. Please contact Solaris support. | Contact Solaris. |
| 412 | INVALID_MODEL | Technical error. | DE: Ein Fehler ist aufgetreten. Bitte kontaktieren Sie den Support. EN: An error has occurred. Please contact support. | Check the request JSON body and retry the call. Contact Solaris if the issue is not solved. |
| 412 | INTERNAL_REQUEST_ERROR | Technical error. | DE: Ein Fehler ist aufgetreten. Bitte kontaktieren Sie den Support. EN: An error has occurred. Please contact Solaris support. | Contact Solaris. |
| 412 | GENERIC_ERROR | Technical error. | DE: Ein Fehler ist aufgetreten. Bitte kontaktieren Sie den Support. EN: An error has occurred. Please contact Solaris support. | Contact Solaris. |
| 412 | ACCESS_BY_AUTHORIZED_HOLDER | The customer is not the account holder but an authorized person on the account. This is not allowed for fraud protection reasons. | DE: Sie sind nicht Kontoinhaber. Bitte nutzen sie eine andere IBAN oder fahren Sie mit der Video-Identifizierung fort. EN: You are not the account holder. Please use another IBAN or continue with video identification. | The customer can try again with a bank account of which they are the account holder. |
| 412 | EXPIRED | The identification has expired (happens after 30 days). | DE: Ihr Identifizierungsprozess ist abgelaufen. Bitte versuchen Sie es erneut. EN: Your identification attempt has expired. Please try again. | A new identification must be created for the customer to restart the process. |
| 412 | ACCOUNT_SNAPSHOT_FAILED | The payment initiation (5-cent transfer) failed. This step is done by an external provider; failure could have various reasons. | DE: Die Bankanmeldung oder Überweisung ist fehlgeschlagen. Bitte versuchen Sie es erneut. EN: The bank login or transfer has failed. Please try again. | The customer can try again with a different IBAN. |
| 412 | JOINT_ACCOUNT | The provided account is a joint account. This is not allowed for fraud protection reasons. | DE: Gemeinschaftskonten sind nicht unterstützt. Bitte nutzen sie eine andere IBAN oder fahren Sie mit der Video-Identifizierung fort. EN: Joint accounts are not supported. Please use a different IBAN or continue with video identification. | The customer must use an account solely owned by them. |
| 412 | ACCOUNT_SNAPSHOT_EXPIRED | The payment initiation expired (10-minute limit). | DE: Die Anmeldesitzung der Bank ist abgelaufen. Bitte versuchen Sie es erneut. EN: The bank login session has expired. Please try again. | The customer did not confirm the 5-cent transfer within the dedicated 10-minute time frame. They must restart the process. |
The following are common questions and answers related to the integration process of Bankident solution. If you have other questions or use cases not mentioned in this guide, contact your Partner Manager for support.
How many identification attempts can a user make?
A single person resource can make a maximum of 20 attempts before receiving a generic error message.
Can I reuse a successful identification for different companies?
There are no technical restrictions on reusing an identification. However, you must define GDPR measures regarding data cleanup and consent reuse.
Are non-German IBANs supported?
No. Bankident currently supports only German IBANs. If your customer does not have a German IBAN, consider using VideoIdent or Fourthline.
Which mobile country codes are supported?
Solaris supports all mobile country codes except:
- Iran (+98)
- North Korea (+850)
Are international addresses supported?
Yes, addresses from any country are accepted. However, identification success rates are significantly lower for addresses outside Germany. SCHUFA primarily stores data for German residents, so matching an international address is less likely to succeed.
How long is the SMS token valid?
The SMS OTP for the Qualified Electronic Signature (QES) process is valid for 10 minutes.
What is the timeout for the bank connection widget?
The session times out 10 minutes after the customer initiates the payment. The timer tracks the window between the payment (cent transfer) and the final signature; it does not include the time spent on data entry.